Advanced Diagnostics Reporting
Overview
If your GLiNet Equipment is having trouble connecting, we can perform an advanced diagnostic to locate any issues that may be occuring. Please follow this guide to gather the information needed only if you were asked to do so by a support technician, or if you wish to provide the information on an initial request to assist us in diagnosing your concern more quickly. Keep in mind, our Technical Support team is working to help you get the best signal, and help get your router connected. We understand how frustrating it is to have to complete so many steps, especially if you're not a computer person, however, this diagnostic information is key to resolving the problem you may be experiencing. Your patience is greatly appreciated.
1. Check Operator Name
- Be sure you are connected to your Router/MiFi's Wireless network. Ignore all messaging you may see about 'No Internet' as the internet is not needed to complete these steps. You can still reach the numbered address below without an internet connection.
- Open a browser and navigate to the mifi or router’s administration page located at: http://192.168.8.1
- Enter your administrator password, or create one if this is the first time logging in.
- On the main page, click on the AT Command Link, below the Auto-Setup, Abort, or Disconnect button
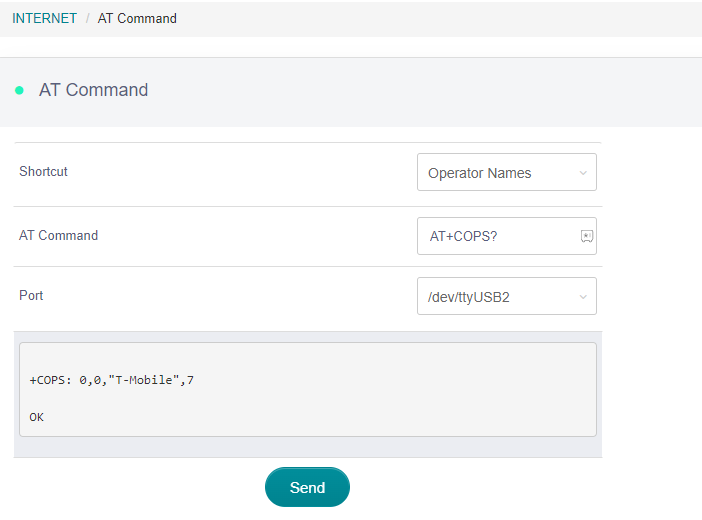
- From the Shortcut dropdown selector, scroll down to Operator Names, then press the Send button
- Please report the message that appears. For reference, you will see a screen as below, but the messaging may be different - this is only a sample screenshot:
2. Check the Cellular Network Information
- Next,
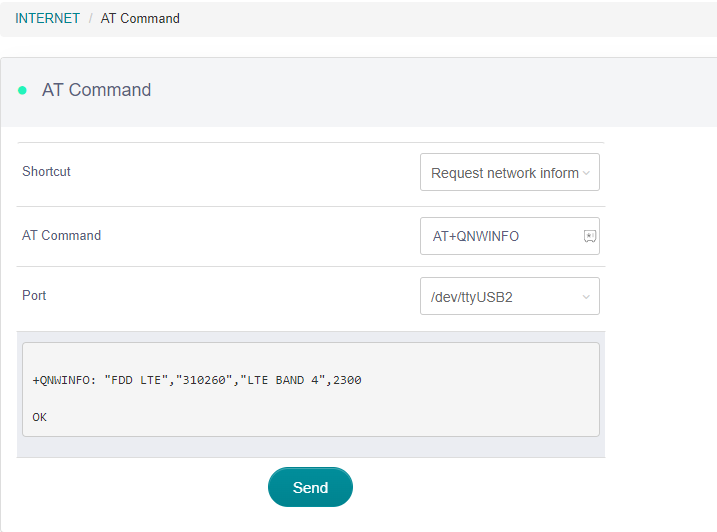
- From the Shortcut dropdown selector, select the Request Network Information option, then press the Send button. Please report the message that appears:
- The screenshot below is only a sample, your output will be different.
3. Check the Signal Quality
- Next,
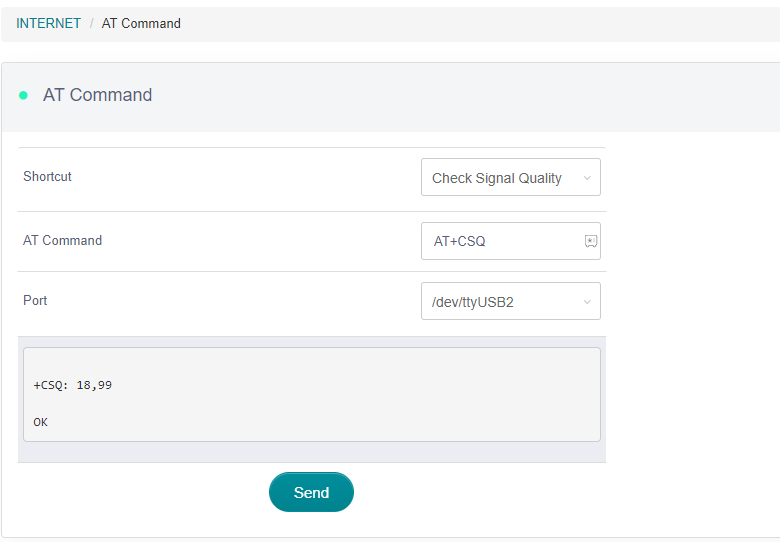
- From the Shortcut dropdown selector, select the Check Signal Quality option, then press the Send button. Please report the message that appears:
- The screenshot below is only a sample, your output will be different.
4. Set LTE Bands to Default
From the Shortcut dropdown selector, select Set Band
Ensure you see a default setting in the Band box
Press Send
The router disconnects from the cellular network, restarts, then reconnects.
Please allow 3-5 minutes for the process to finish.
Related Articles
Cudy Technical Support
For advanced technical support for your Cudy router, please contact: support@cudy.com Travel Data is unable to provide advanced support of these devices.LT18 - AX1800 Product Specifications (Technical)
Attached to this article you can locate and download the product spec sheet for this router.Cudy Remote Assistance
Travel Data is able to provide remote assistance with troubleshooting connections for Cudy devices. Please follow the guide below to allow our Technical Support Team access to your router. Login to your routers control panel - the default is: ...Configure your Cudy LT18 Router
Who Is This Article For? Customers who may need to reference this article include: Existing Customers who are changing from another device to the LT18 Device, and have NOT purchased their LT18 from Travel Data. All Customers should follow the ...