Remote Activation Settings
In order for our support staff to complete your device configuration, please follow these steps. Please know, we cannot provide specific instructions, as your specific device configuration may be different. *See below if your pages look different than these as a new software update has changed the page*
Firmware 3.X Steps
- Login to your router by visiting http://192.168.8.1 (If you don't know the password, you may need to reset your device, and set a new password)
- Select the Applications Tab from the menu, it will expand;
- Select the Remote Access tab from the menu;
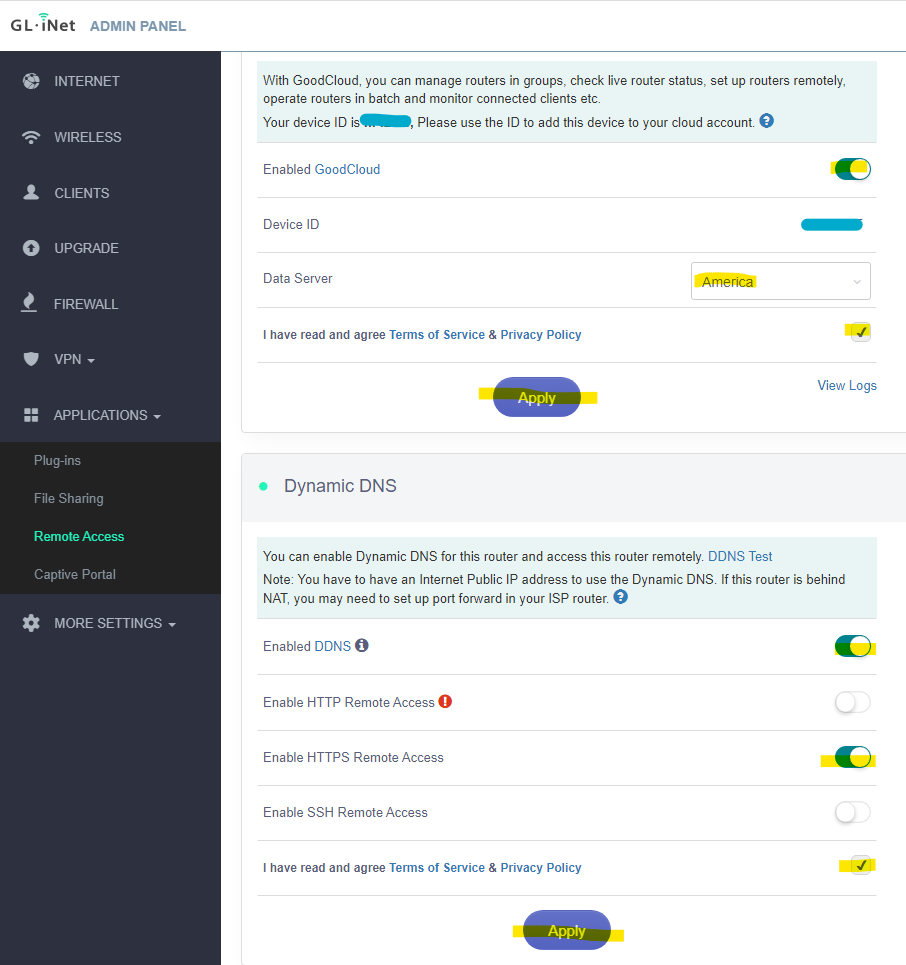
- Enable Cloud Management: Tick the enable slider to 'on', select 'America' from the dropdown selector, check the box to accept the terms, press the 'Apply' button, and wait for success message
- NEXT: Enable DDNS, tick the enable slider to 'on', Enable HTTPS Remote Access, check the box to accept the terms, press the 'Apply' button, and wait for the success message.
Important Software Change: See the updated image below if your current page is different.

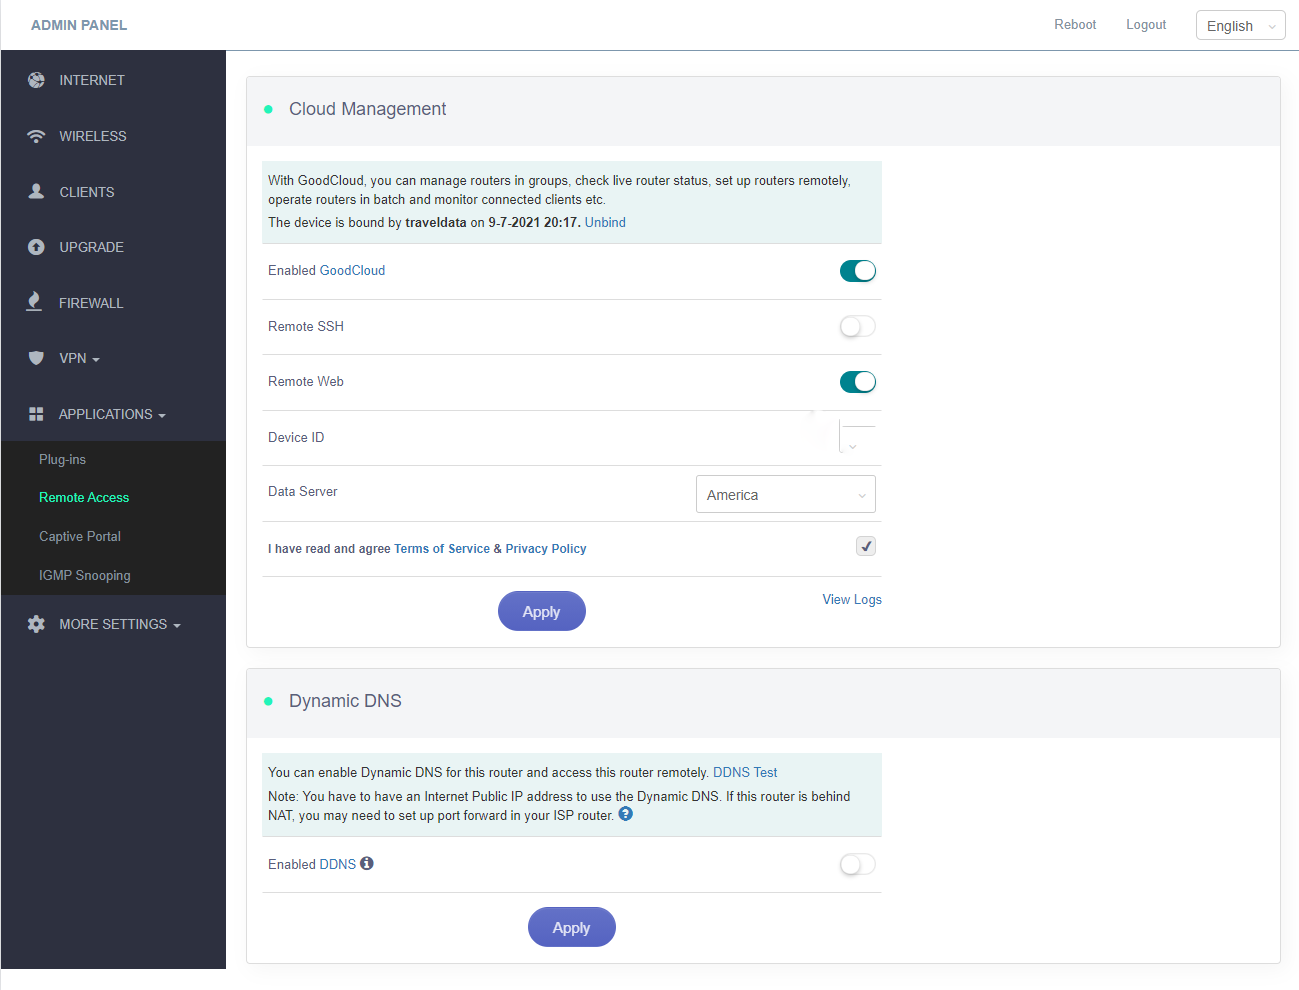
***The latest version of the device software has been modified. Please use the settings below if your page looks different than above.
Enabled GoodCloud should be on
Remote Web should be on
Data Server should be America
Check to agree to terms
Press Apply
Dynamic DNS can be left off with this software version only.

Firmware 4.x Steps
- Login to your router by visiting http://192.168.8.1 (If you don't know the password, you may need to reset your device, and set a new password)
- Select the Applications Tab from the menu, it will expand;
- Select the GoodCloud tab from the menu;
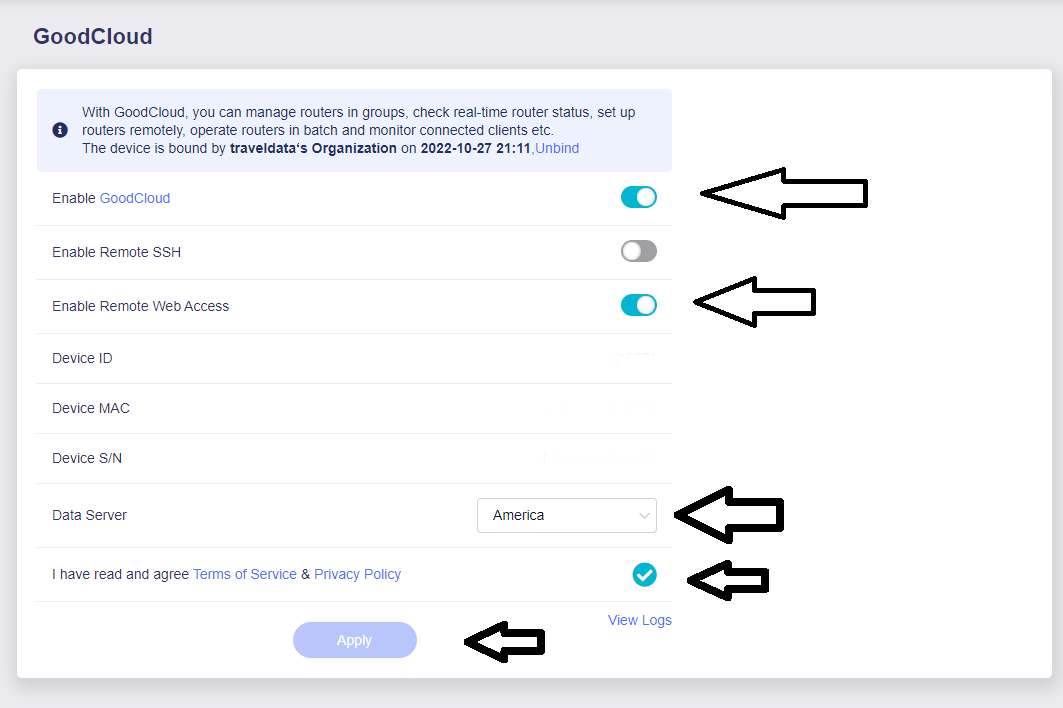
- Enable GoodCloud: Tick the enable slider to 'on'
- Enable Remote Web Access: Tick the enable slider to 'on'
- Data Server: select 'America' from the dropdown selector, check the box to accept the terms, press the 'Apply' button, and wait for success message
- Once applied, you may exit the browser window

Once completed, please reply to your support ticket and inform the support agent that your device is ready to receive the configuration file.
Travel Data will configure your device as quickly as possible and respond to you via email with a completion notification.